Write a KILLER YouTube SCRIPTS in 25 Minutes (Proven Template)
Hey, I’m going to go over how you can write a killer YouTube script in less than 25 minutes.
Without wasting your time writing all day & having people click off your videos within the first 30 seconds.
But how do you write a script if you’re not a good writer, too busy to write, or can’t afford to outsource?
I got you!
Hi, I’m Helmi & I use this exact YouTube scripting formula that I’ll be revealing in this article on my personal finance channel to get views like these:

and those views got a company I promoted in the video 826 PAYING CUSTOMERS:

The very same script is also what I used to get my YouTube clients booked calls like this:

All from my YouTube script formula.
At the end of this video, we’ll go over the 4 steps to produce a killer YouTube script that’ll get you the views that you deserve, earn you raving fans, and ultimately more leads for your business.
STEP 1: Your Video Blueprint
The MOST IMPORTANT thing is VALIDATING your video idea.
Your video idea MUST be able to answer all the questions in my Video Blueprint table.
If it doesn’t, scratch the video idea & move on to the next idea.
So, here it is. I know for some of you newbies, you need examples on how to fill this up.
So I’ll be using the script to create this very video that you’re watching as an example of how to fill out this table:
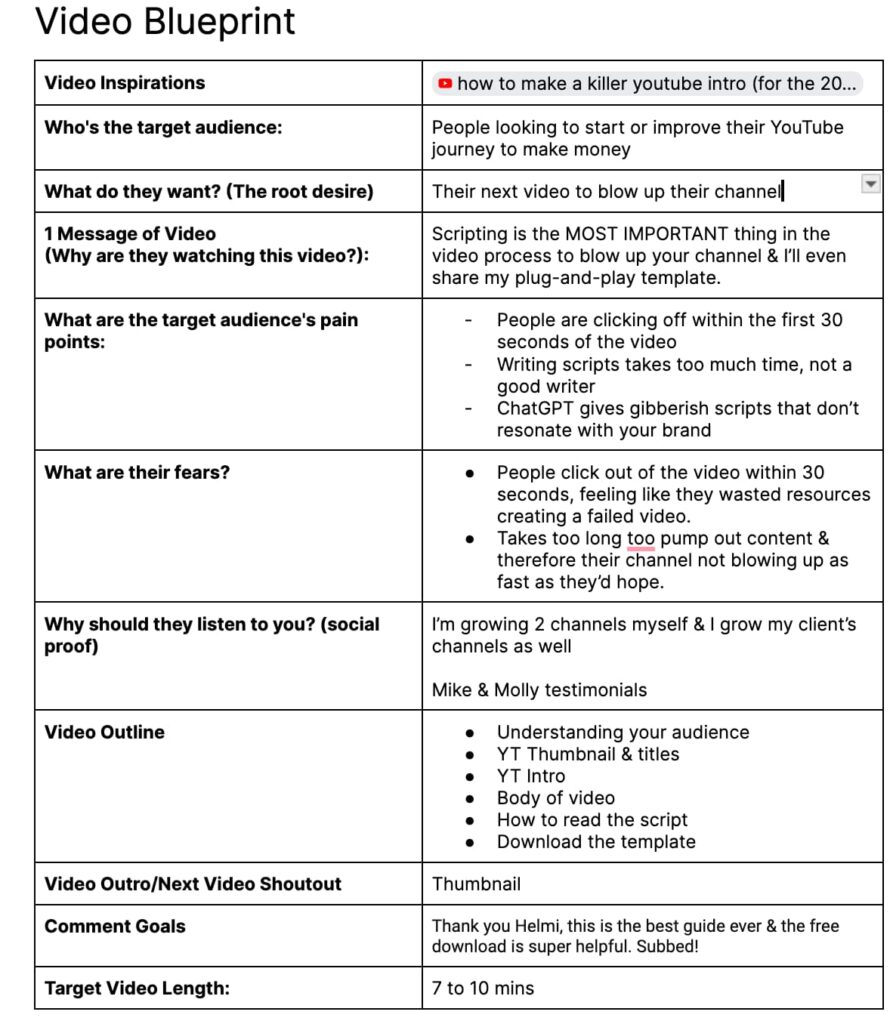
If you’re too lazy to type these in manually, you can download my plug-and-play template ↓
STEP 2: YouTube Thumbnail & Titles
Will people click on your video?
You’re competing with other videos on YouTube and the competition has never been more fierce.
I’d screenshot 8 of the best videos I’m competing with and arrange them into a 3×3 grid in Miro (or any whiteboard software of your choice), but keep the middle empty.
It’ll look like this:
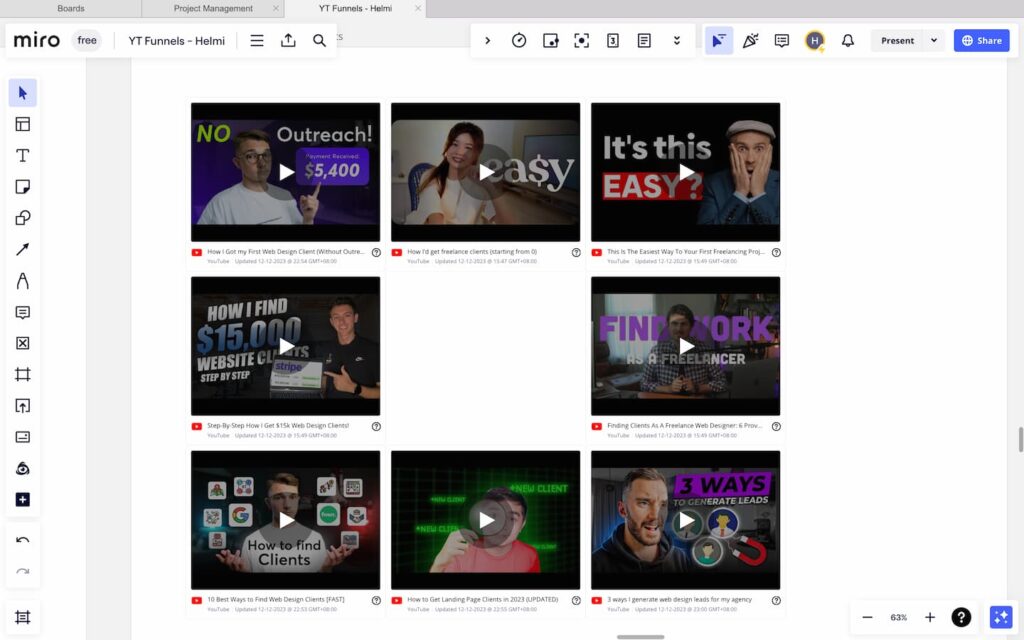
Next, I want to place my thumbnail & title preview in the middle of that grid to see if it’s good enough to pull attention away from these competitors.
To get my thumbnail preview, I use a website called thumbsup.tv.

It’s a free website where you can upload your thumbnail & title to preview how they’d look on the YouTube homepage, sidebar, and on mobile:

I’d screenshot my thumbnail & title combination from thumbsup.tv then place it in the middle of that grid, like this:
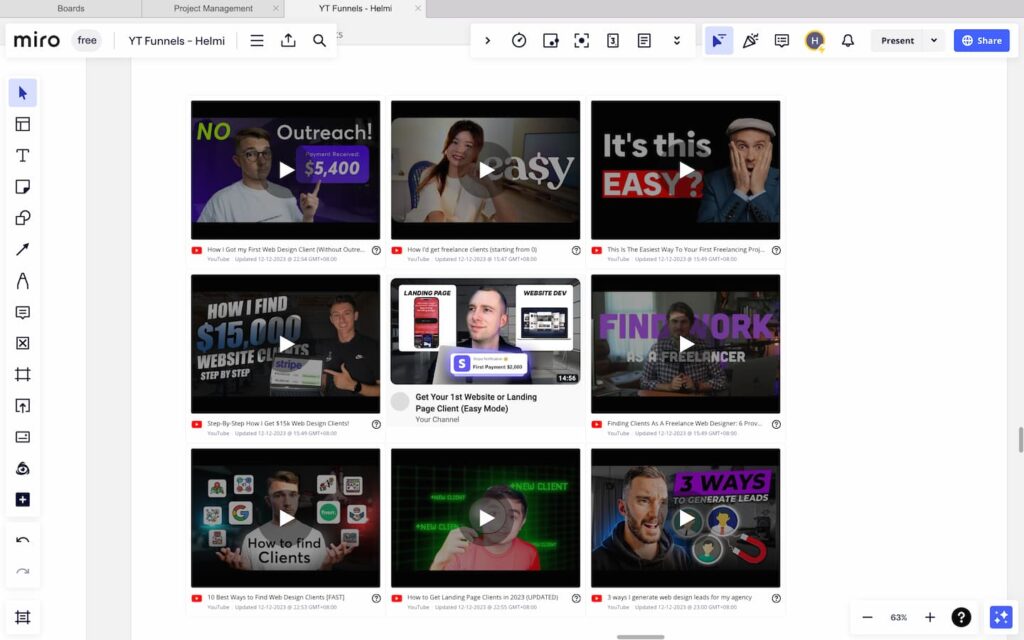
I put myself in the shoes of someone browsing in my topic.
If I were to see my thumbnail, would I click on it over the competition?
Be honest. If my design doesn’t stand out,I’d go back to Photoshop and edit my thumbnail and title until I feel like it’s more interesting than the rest:
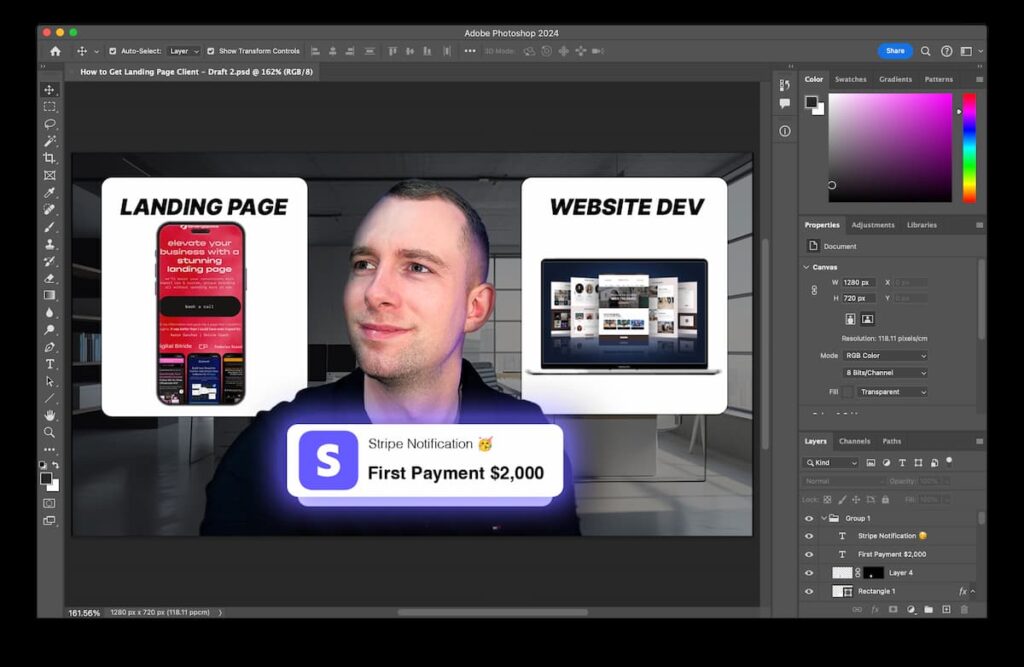
If you don’t know how to create a clickable thumbnail (which is an entire topic by itself), you can learn how here.
STEP 3: Your Killer YouTube Intro
This is where the rubber meets the road.
It is THE determining factor if someone clicks off from your video within the first 30 seconds, or sticks around and watches till the end.
The YouTube intro is so important that I’d recommend you to spend your efforts:
- 40% in designing your thumbnail & title
- 40% scripting your intro
- 20% for the rest of the video
I learned a lot about YouTube intros from Aprillynne Alter (she’s awesome btw).
But I merged some other info I got from other people to make my YouTube intro template a little bit better IMO.
Here’s an example of the Killer YouTube intro table filled out with the very script I used for this video:

If you’re too lazy to type these in manually, you can download my plug-and-play template ↓
Checkpoint – alright, we covered a lot. So make sure:
- All columns in the Intro table is filled out
- Read the script out loud & you like the flow
- You’re able to rehearse the entire intro script in less than 30 seconds
STEP 4: Body of Your Video
The body of the video is the easiest part.
I’d outline the video body in bullet points.
Then, I’d fill out the body like a blog post (kinda like this document right now).
Unlike writing for your school, keep the script 1 sentence short so you can easily skim through it while recording later.
Include as many visuals like screenshots and screen recordings as possible or else your educational video will be too boring.
At the end of the video, the call-to-action (CTA) should either be to tell the viewer to click on something like watch another video of yours.
So that’s how you write a killer YouTube script.
BONUS: Get More from Your Script
But wait, you’ve already spent a great deal of effort writing your script, do you know that you can reuse it as:
- a blog post like what you’re reading right now
- content for your email newsletter
- content ideas for a long thread on X or LinkedIn
- short form video ideas
Imagine that… you get all of this content for your personal brand repurposed from ONE YouTube script.
Talk about being smart!
I hope this has been helpful and good luck!
Let me know in the comments if you still not sure about anything I went over in this article.
Want to Make Your Scripting Even Easier?
Download my YouTube Script template below and plug and play for your video idea & niche:


