Instarem: Cheap International Money Transfers – Malaysia to Indonesia for Bibik
If you need to transfer money abroad, you’d probably looking for a remittance company that is:
- Safe & reliable money transfer
- Cheap international transfer fees
- Transparent pricing: No hidden fees
- A convenient app to transfer money anytime
- With a loyalty program for frequent transfers
You can achieve all the above & send money to any country using Instarem, but my example today will show a step-by-step guide on how I help our domestic maid send some of her money back to her family in Indonesia.
If you are a family with young children, this could be a very relatable scenario.
Only the sender is required to register an account with Instarem. The recipient does not need to register an account, as Instarem will transfer the money directly into their local bank account.
Before you start sending money with Instarem though, there will be 3 processes that I’ll cover in this article & video:
Prerequisites to Transfer Money with Instarem
Before you do the money transfer, make sure you prepare the following info:
- Required info of the sender
- Required info of the recipient
Let’s start with the first:
Required Info of the Sender
- Register an account with Instarem.
- ID for verification purposes (IC or Passport) to be scanned using your phone.
- Insert this referral code HELMI to get MYR100 off for your first 2 transfers.
Required Info of the Recipient
- Recipient’s first & last names
- Recipient’s mobile phone number
- Recipient’s email
- Recipient’s physical address (including city, state, and postcode).
- Recipient’s account details:
- Bank name
- Bank SWIFT Code
- Bank account number
Once you have all the above ready, you’re ready to move on to the next stage, which is to register an account with Instarem (only the sender needs to sign up with Instarem).
Sign Up with Instarem – Step-By-Step Guide
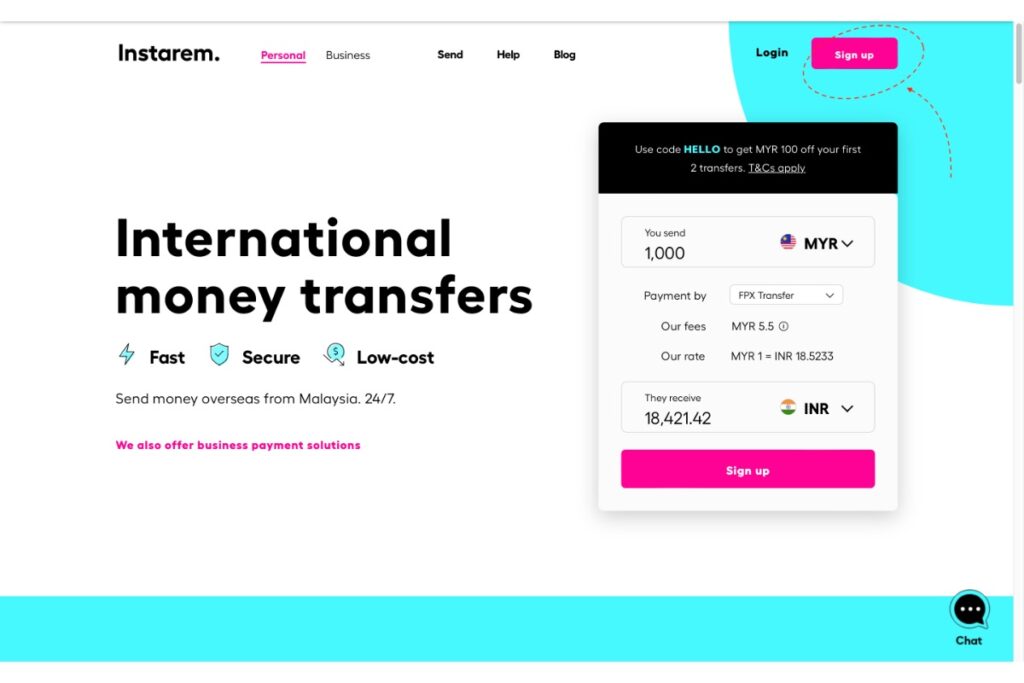
The first thing you need to do is to register an account with Instarem, either on a PC or mobile app.
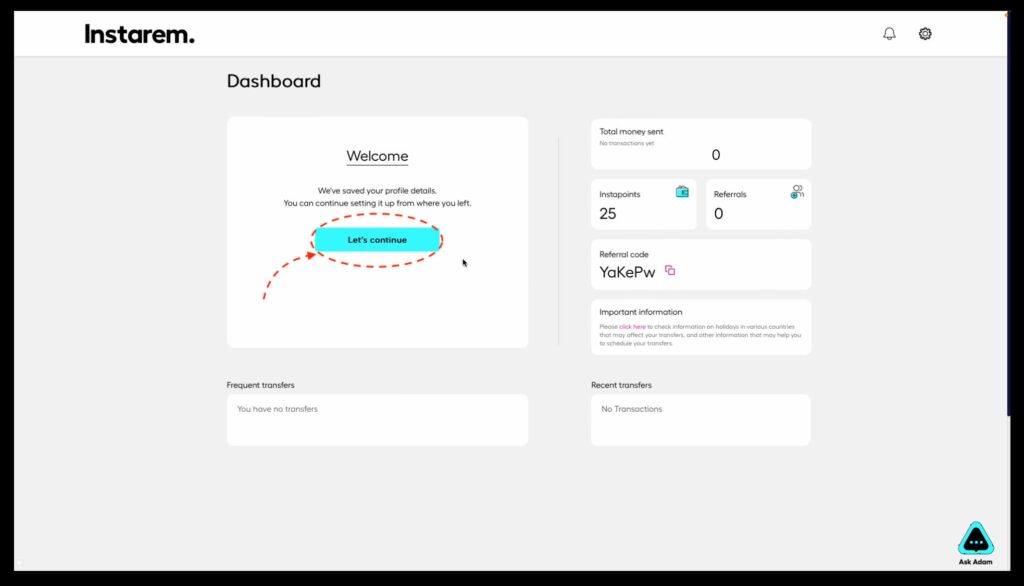
After successful sign-up, you’ll automatically be logged into your Instarem dashboard.
It will look something like this. Next, click on the ‘Let’s Continue‘ button to start your account verification process.
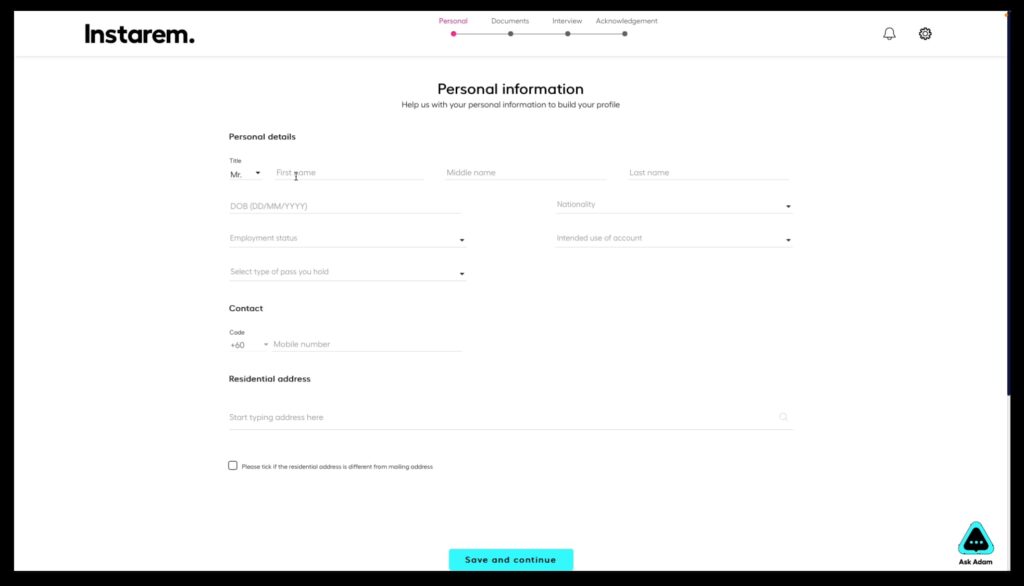
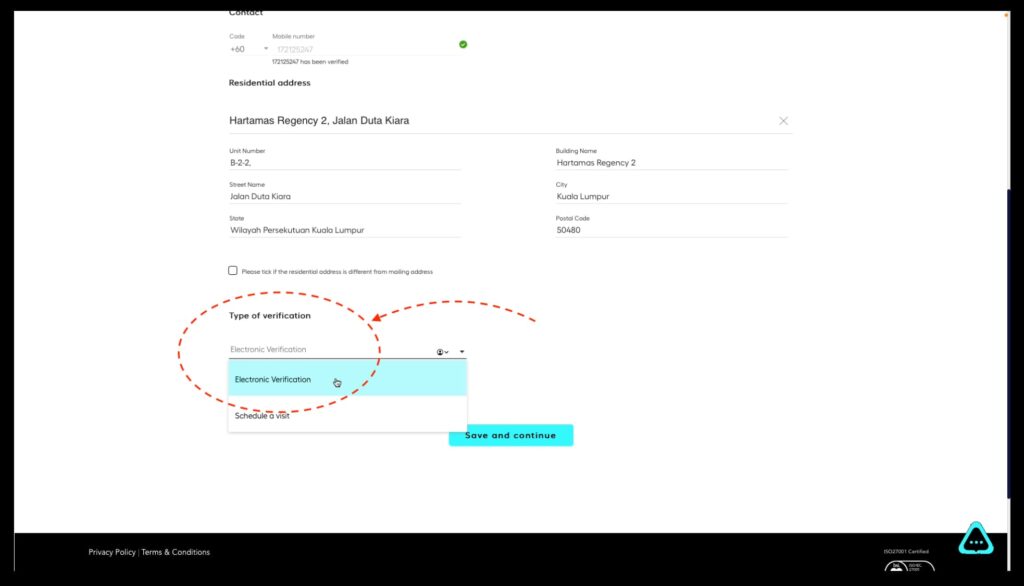
On the next page, fill out your personal information as the Instarem account owner (sender):
At the bottom of that page, select your account verification method. In my example, I picked ‘electronic verification:’
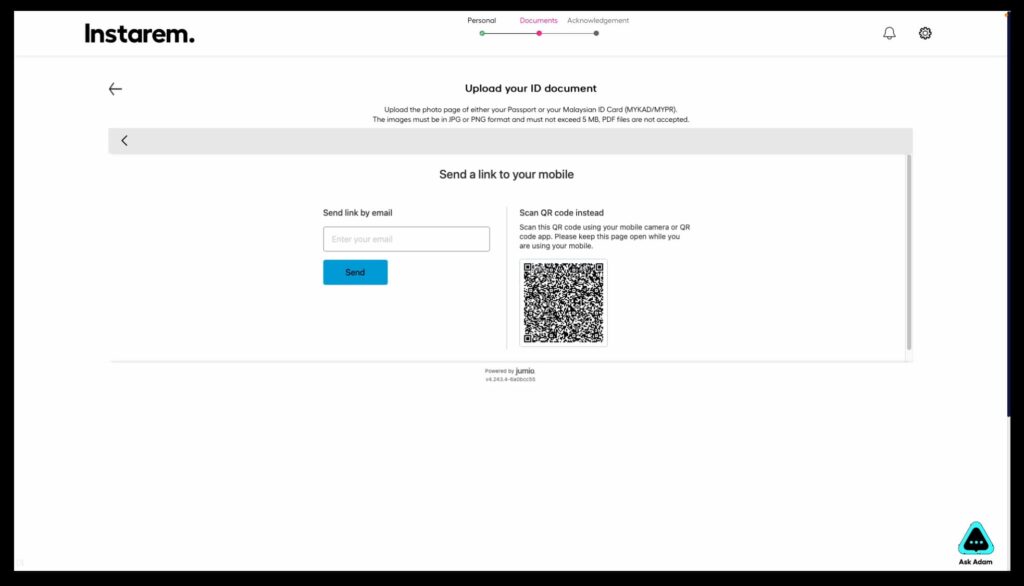
The next step is to upload a scanned copy of your ID. You must install the Instarem app to do this. App Store. Google Play Store.
2 ways to install the Instarem app:
- Scan the QR code to Install the Instarem app on your phone.
- Send a link to your email to install the Instarem app.
In my example below, I choose to send the link to my email.
Install the Instarem app on your phone, then log into your account:
This page will tell you about the ID verification process.
Click on ‘Start.’
Allow access to your camera as you need to use the camera to scan your documents.
Next, select the ID type that you’ll be scanning. In my case, I choose to scan my passport.
When the scan document prompt appears, make sure you place your ID within the set boundaries:
Next, they’ll ask for a selfie, so place your face to be within the face boundaries:
Then, they’ll submit all of these documents automatically & get your account verified. Mine was almost instantaneous.
OK, now we got the verification out of the way, in the next section, I’ll show you a step-by-step guide on how to transfer money from one currency to another.
In my case, transferring money from Malaysia to Indonesia.
Transferring Money Abroad – Step-by-Step Guide
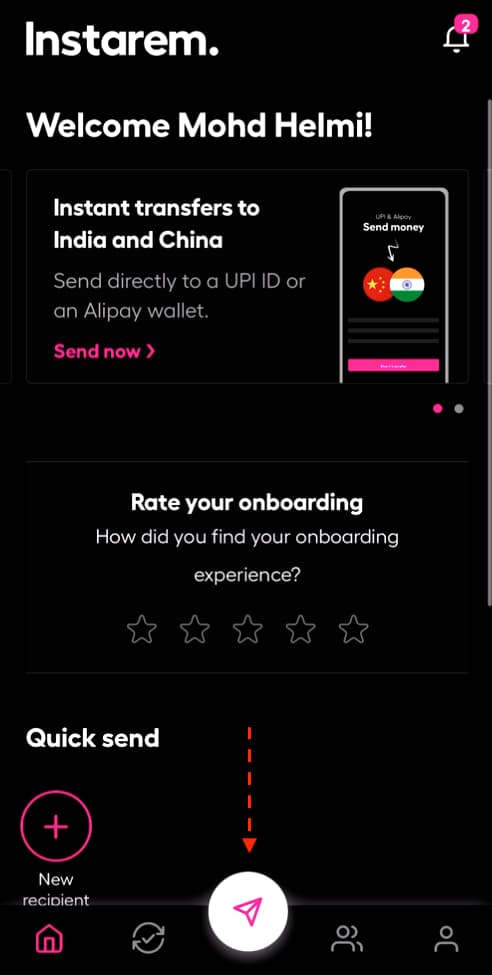
Log in to your Instarem account & click on the paper plane icon at the bottom of the app:
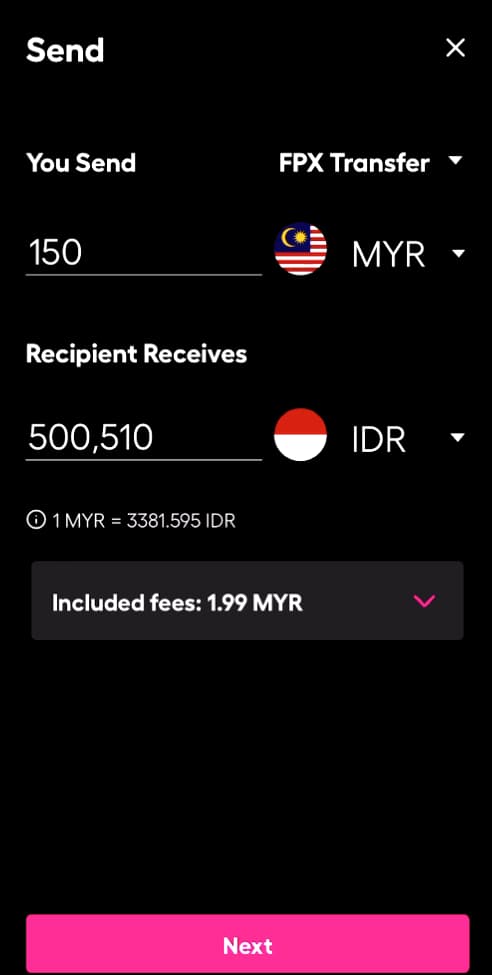
Next, click on the currencies involved. In my case, I’m sending MYR 150 to IDR.
The cool thing is that it shows all the included fees.
If all is good, click on ‘Next‘:
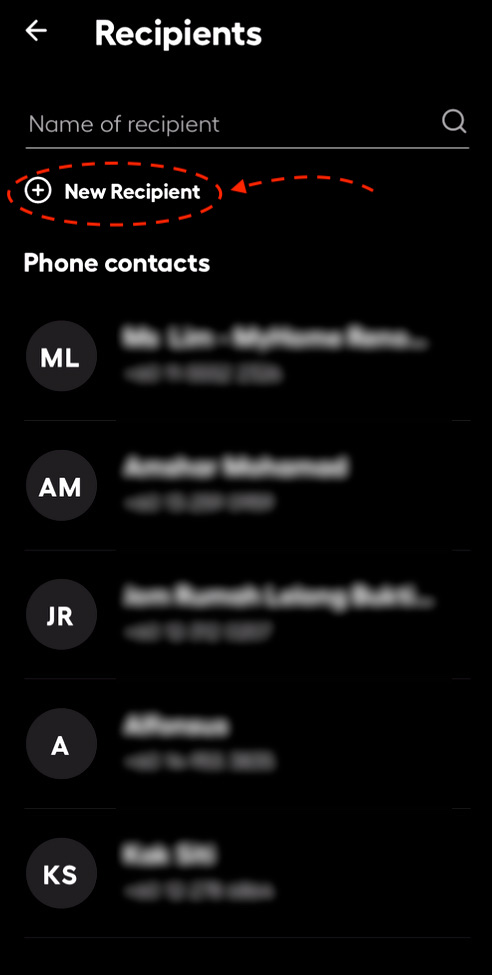
Click on ‘New Recipient‘
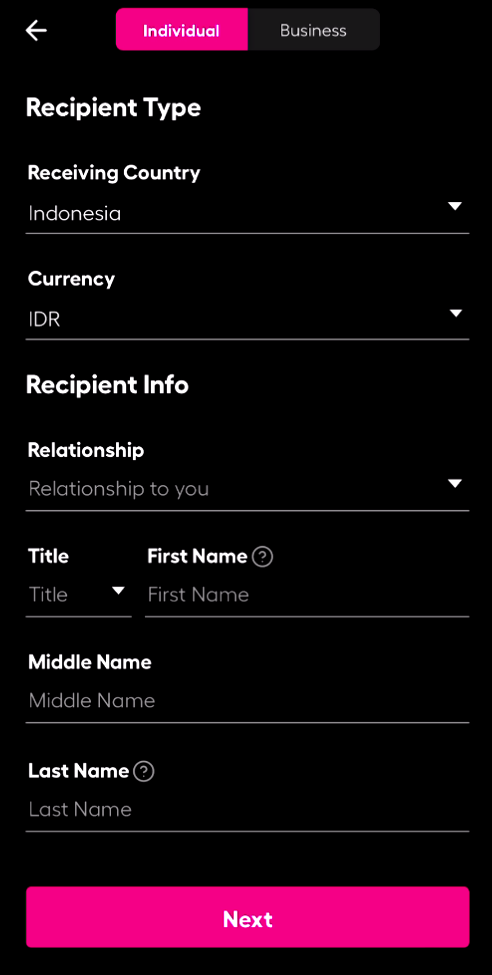
Fill out all the recipient info on this page.
Here is all the required info again:
- Recipient’s first & last names
- Recipient’s mobile phone number
- Recipient’s email
- Recipient’s physical address (including city, state, and postcode)
Click on ‘Next‘
Next, fill out the recipient’s account details:
- Bank name
- Bank SWIFT Code
- Bank account number
Click on ‘Next.‘
Review before you start sending.
You can apply the code ‘HELMI‘ to get MYR 100 off on the first 2 transactions if you missed out on this code in the registration part.
Then click ‘Authorize Transfer‘ & make the payment via FPX or credit card.
That’s it!
It will show the transfer status & the estimated timeframe when the recipient will receive the money.
Get Instarem
I hope this guide has been helpful. You can apply the code ‘HELMI‘ to get MYR 100 off on the first 2 transactions. Get Instarem below:
00:00 – Video starts
01:25 – Getting all info ready
01:42 -Required info of the sender
02:20 – What recipient info do you need?
05:26 – Transfering money abroad guide

